Thursday, 27 February 2014

Boot-Repair

Sometimes after completing an installation of a Linux distribution or creating a dual or multi boot system, there might be some problems with the boot-loader. An easy solution I have used for fixing this problem is a free software called Boot-Repair.

Boot-repair image can be downloaded and burnt to disc or installed to a USB using UNetbootin to create a recovery media. Boot from the media choice with settings enabled in bios first.


Most likely if are just after installing Linux you can run a live session, install Boot-Repair and run it from there. This method will require a connection to the internet.

Terminal commands

sudo add-apt-repository ppa:yannubuntu/boot-repair && sudo apt-get update

sudo apt-get install -y boot-repair &&(boot-repair &)

Boot-Repair will automatically start when installed.If not boot-repair in the terminal should start it.

If there is no internet connection and its an Ubuntu installation I would recommend using LinuxSecureRemix, Ubuntu image with Boot-Repair and OS-Uninstaller included.


Using the recommended repair will usually do the trick and after a reboot you will have access to your operating systems again.


There are advanced options if its more you need.


Choices where to install the GRUB boot-loader or repair Windows boot files


Boot-Repair can be used to recover access to 
Windows(XP, Vista, 7 and 8)
Debian, Ubuntu, Mint, Fedora, OpenSuse, ArchLinux or a derivative


Wednesday, 19 February 2014

Unetbootin

UNetbootin is a very handy tool to create a boot-able live usb for Linux distributions.

It is a great way to check out different operating systems

There are supported plenty of distributions to select from, ready out of the box or you can install from an image you have already downloaded.

Not limited to operating systems there are a selection of tools which can be run to partition drives, recover systems, repair boot loaders, remove viruses and malware from windows computers.


The drop down menus allow you to select from a range of different distributions and tools.

UNetbootin will download and install to your usb making it possible to run a live session.

Today I will create a live usb  to try the latest version of Tails OS.

I have already downloaded the image, so I will use the Disk image option.


Run UNetbootin


Select Disk Image, then browse you system to where you have the image.


For now its Tails ISO in the downloads folder.


Once selected be sure it is your usb device as the destination for you live install.

Here I can see its /dev/sdb1.

The files will start to load and install a boot-loader.

When complete reboot your computer and select to boot from usb.

The default UNetbootin boot-loader will appear.

Choose try without installing to load a live session, or install to directly install.

Once loaded on live session most operating systems will have an option to install directly

from the desktop.

Give it a go, as there are numerous operating systems worth trying.

UNetbootin can be downloaded for Linux,Mac and Windows 


Thursday, 13 February 2014

Import MySQL database using SOURCE

Importing files to MySQL database using SOURCE.

Start MySQL console

Create database DATABASE_NAME;
Use DATABASE_NAME;
Source path/to/file.sql;

Here I have created a new database 'Example' and started using it.
Then using Source to import a file called world.sql.

create database Example;

use Example;

source /home/glen7/Documents/world.sql;


After show databases we can see that 'Example' has been imported.


Check for tables
Show tables;


Check schema of tables, City in this case.
describe City;


There are practice databases for you to download and use to practice on the MySQL website.

Sakila database and world database.


Other good resources for SQL are 


Sunday, 9 February 2014

Irish Road Signs App for Windows Phone

This is an app I Created with C#, xaml and xml using Visual Studio for windows Phone.
The app is designed to help learn some of the road signs in Ireland.
There is a study section to get familiar with the signs and quiz section to test your knowledge.

Saturday, 1 February 2014

Install Libre Office 4.2


Links to download for Linux, Windows and  Mac
http://www.libreoffice.org/download

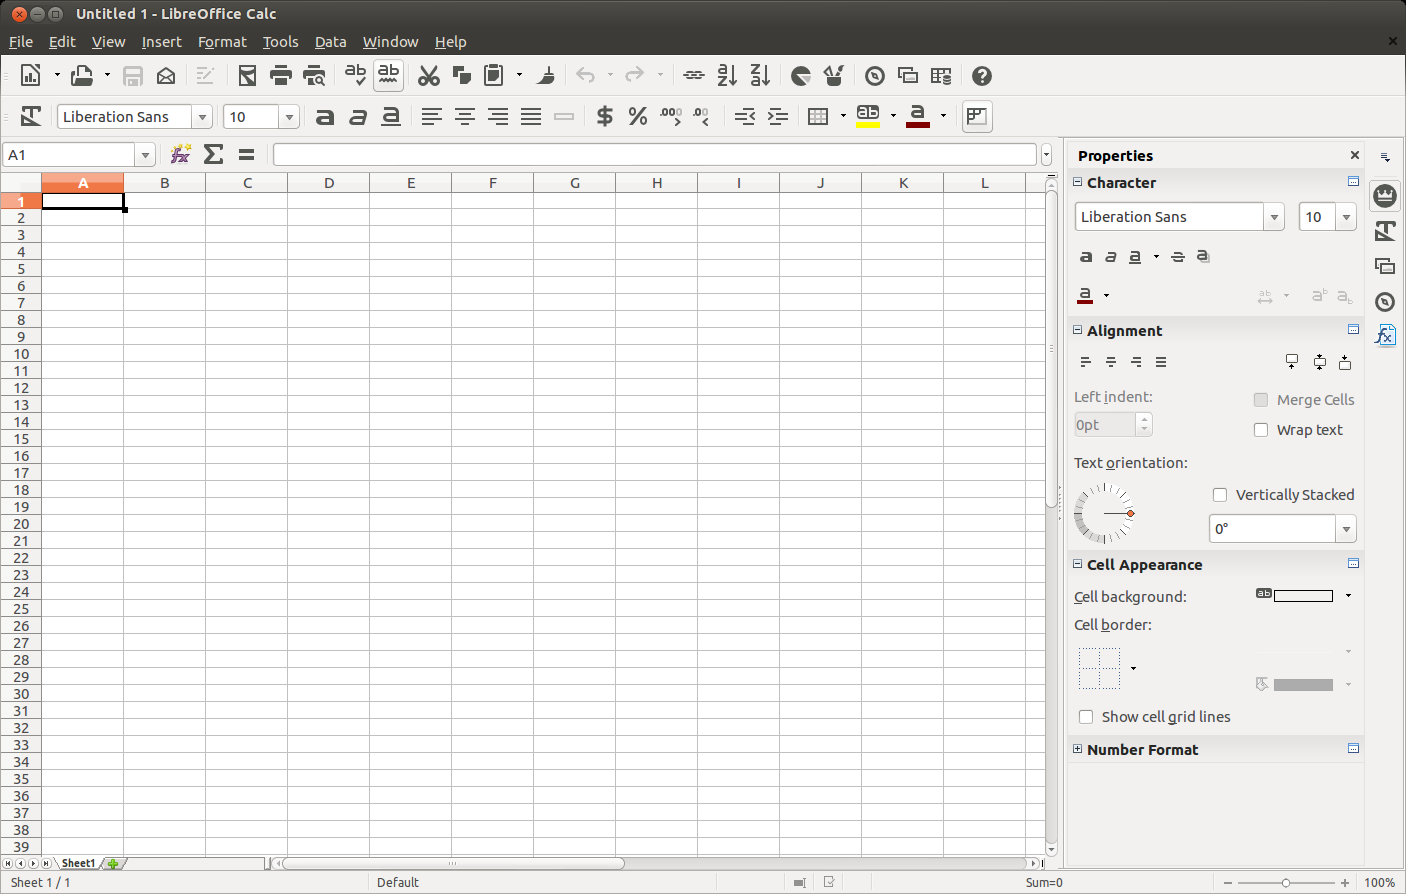
With the latest package are monochrome icons and the sidebar.

Installations I have completed are on deb(x86_64) on Ubuntu 12.04 & 12.10

Use the following commands as root to remove a current version of
Libre Office if there is one installed.

sudo apt-get remove --purge libreoffice*

sudo apt-get clean

sudo apt-get autoremove


Use the following commands as root to install Libre Office 4.2

Access  Downloads

cd Downloads

Extract tar.gz with -

tar -xf  LibreOffice_4.2.0_Linux_x86-64_deb.tar.gz

To view contents -

ls -a

Access  LibreOffice_4.2.0_Linux_x86-64

cd LibreOffice_4.2.0_Linux_x86-64

Access DEBS folder inside -

cd DEBS

Then install all packages inside -

sudo dpkg -i *.deb

New Dash


Writer with default icon theme


Add new icon themes and sidebar.


Tools - options - View to add new Sifr  monochrome icons


Tools - options - Advanced - enable experimental features.


Views - sidebar


Result

Calc with new icons and sidebar


Writer with sidebar